
An observational approach is terrific for nature study, but doesn’t quite do the trick when it comes to anatomy, does it? It can be challenging to adequately teach about muscles and bones, when all the moving parts all hidden away inside our bodies. We simply can’t see under our skin!
But exciting hands-on activities—like building this set of faux muscles and bones—are an effective way to transform the study of anatomy into something students can actually see and touch.
In addition to the wide array of science and health books included in Science F: Health, Medicine and Human Anatomy, there are also a plethora of hands-on activities, scheduled at regular intervals throughout the year. Linda Allison’s Blood and Guts: A Working Guide to Your Own Insides is particularly full of terrific project ideas (and, yes, animal organ dissection tips, too!) This simple science demonstration adapted from the book shows how skeletal muscles work in pairs.
Create a Model Arm to See Muscles at Work
On an average day, you might not give your elbows more than a passing thought, but have you ever tried to
- write a letter,
- brush your teeth, or
- eat a meal
without bending your elbows at all? You quickly realize how important they are! Of course, even an elbow joint wouldn’t do you much good, if you didn’t also have bones, muscles, and tendons working together to help the elbow bend.
Are you ready to see how these all work together? Let’s build a model of the human arm, using a few items you might even have around the house already.
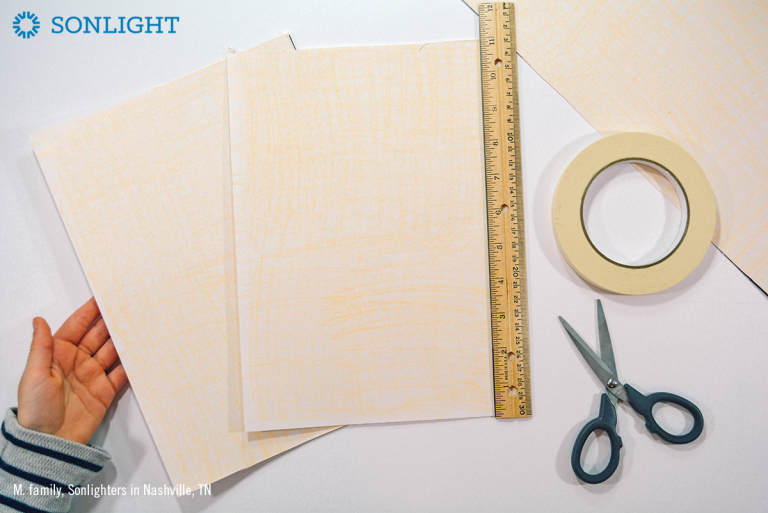
Materials Needed
- Poster board
- Ruler
- Marker
- Scissor
- Masking tape
- Straight pin
- Large paperclip
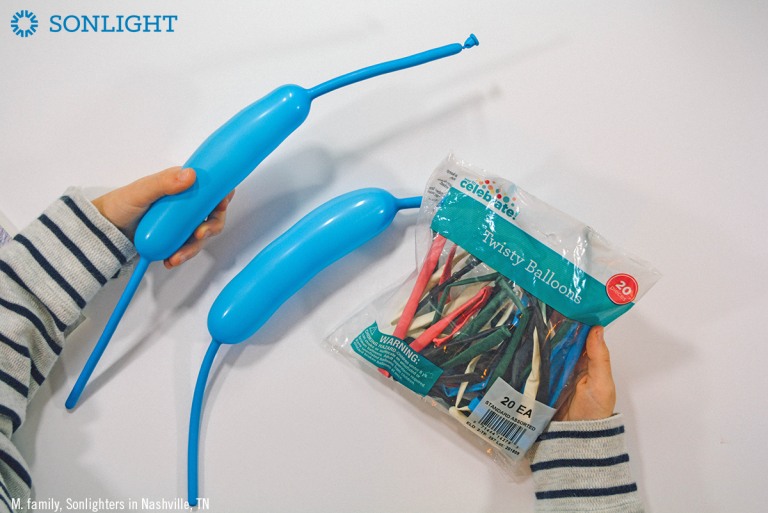
- Long balloons
- Optional: Crayon or paint
Instructions
You may choose to color the poster board a bone-like shade, as we did, or you may opt to leave it white.

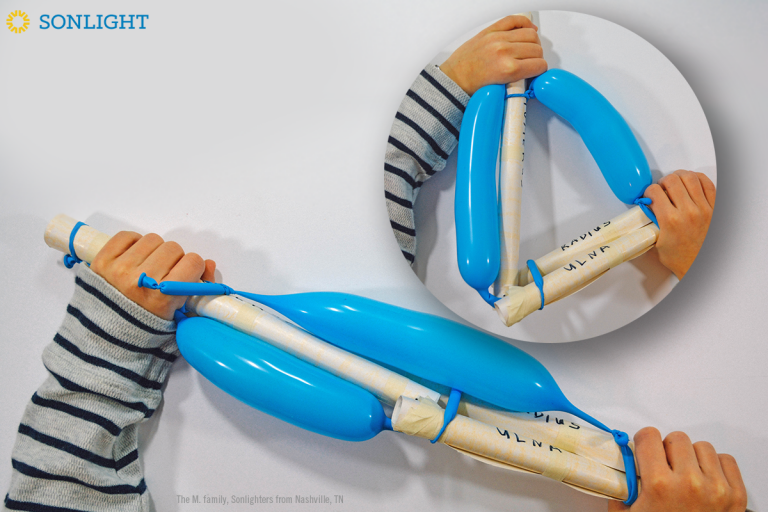
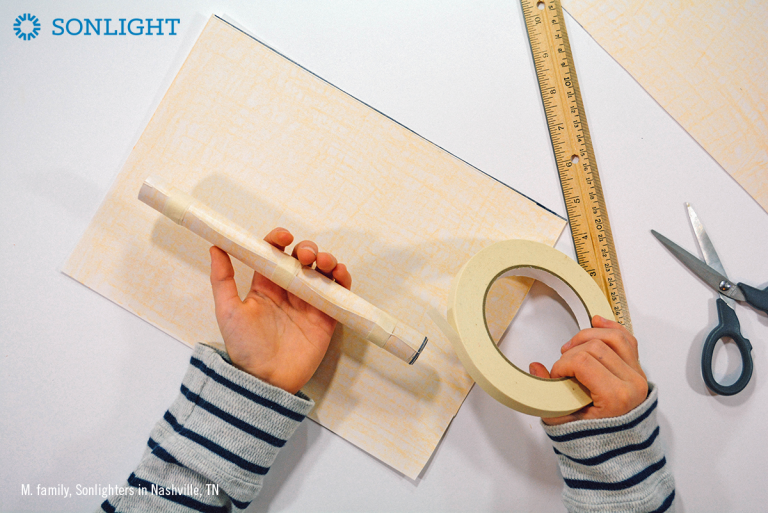
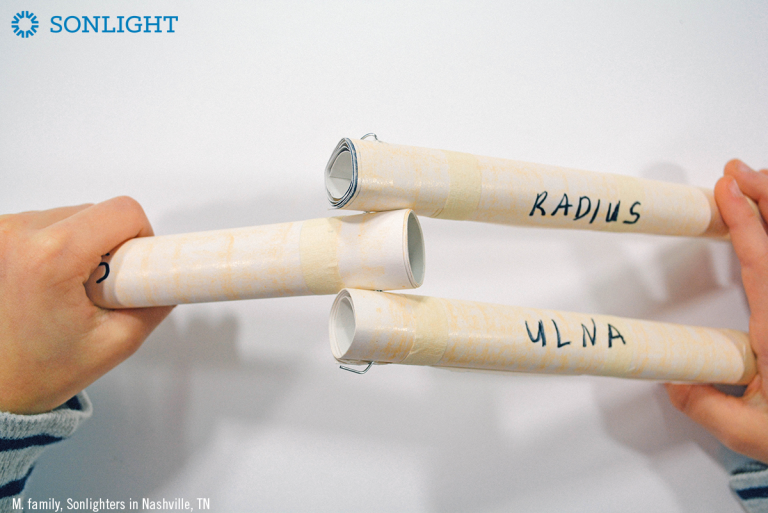
Cut two 8”x11” pieces from your posterboard. These will become the radius and ulna.
Roll each of these 8”x11” sections and secure with masking tape, creating two eight-inch-long arm bones (the radius and ulna).
Return to the remainder of your poster board. Cut a section that’s 12”x11” .
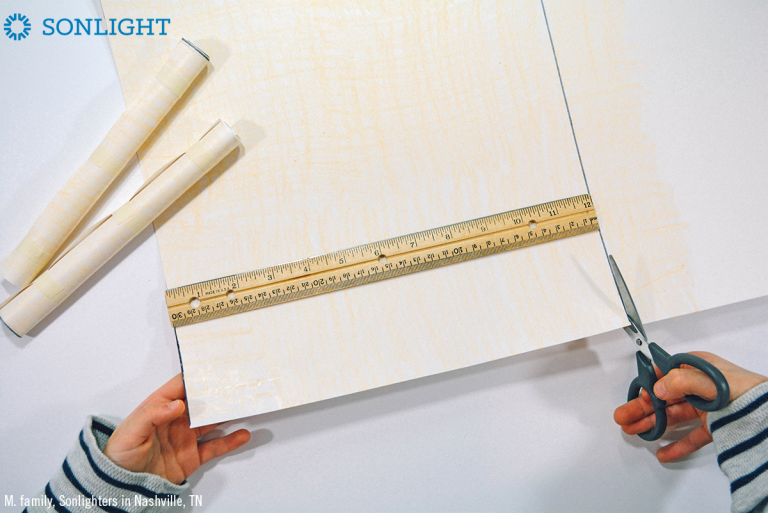
Roll this section. Secure with tape to create a twelve-inch-long humerus.
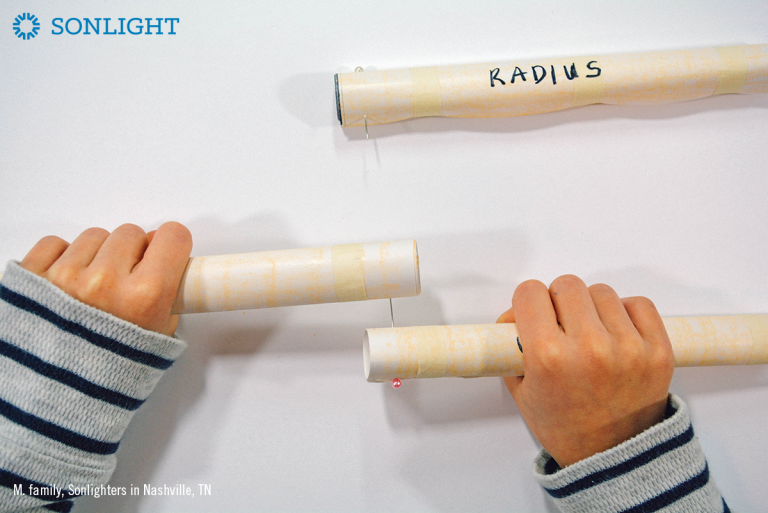
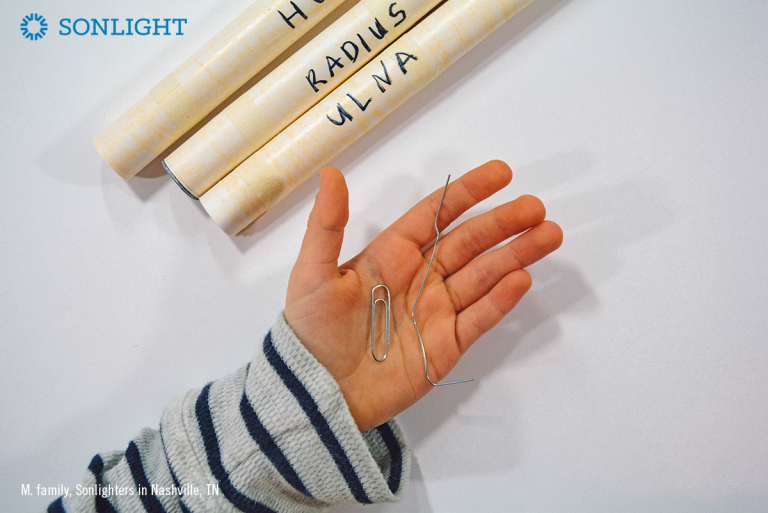
Label each of the three bones. The two 8" bones are the radius and ulna. The one 12" long bone is the humerus.

Use a long straight pin to pierce a hole through the humerus, about a half-inch from the right end. Pierce a hole through the ends of the radius and ulna, too, about a half-inch from the left end.
Straighten a paperclip to create a long flexible wire. Bend a hook at the bottom end.
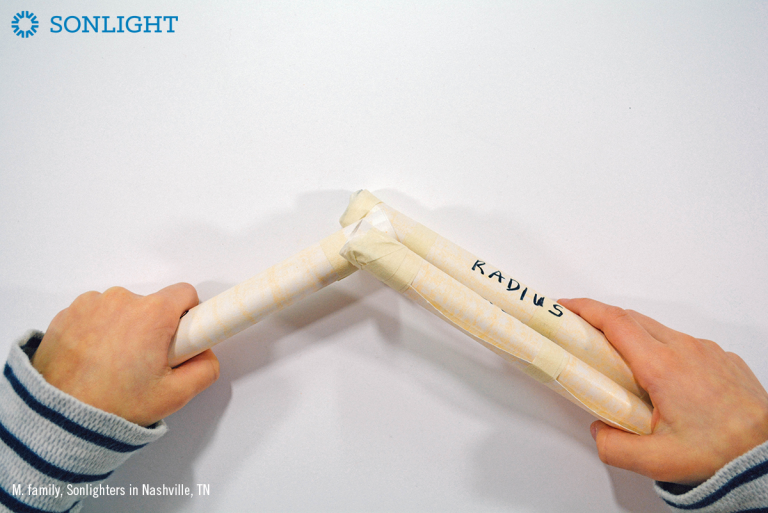
Place bones on the table. You’ll want the humerus on the left, the radius on the upper right, and the ulna on the bottom right, as shown. Line up the pierced holes, then thread paperclip wire through the holes to create a joint.
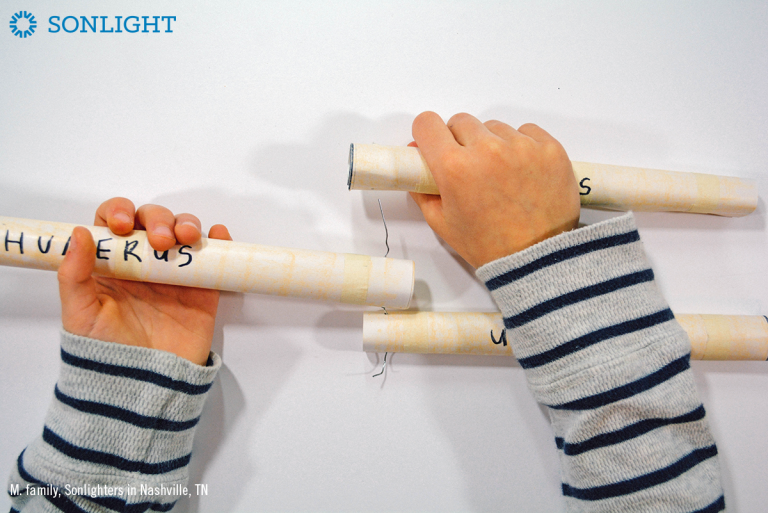
Make sure the wire is bent at each end, to keep the wire from pulling out.
You’ll also want to tape over the sharp ends, to keep the wire from popping the balloons.
Partially inflate two long balloons, leaving a tail at both ends. These are your bicep and tricep muscles.
Tie the right end of the bicep balloon to the radius and ulna. (You might want to tie it a little closer to the elbow joint than we originally did.)
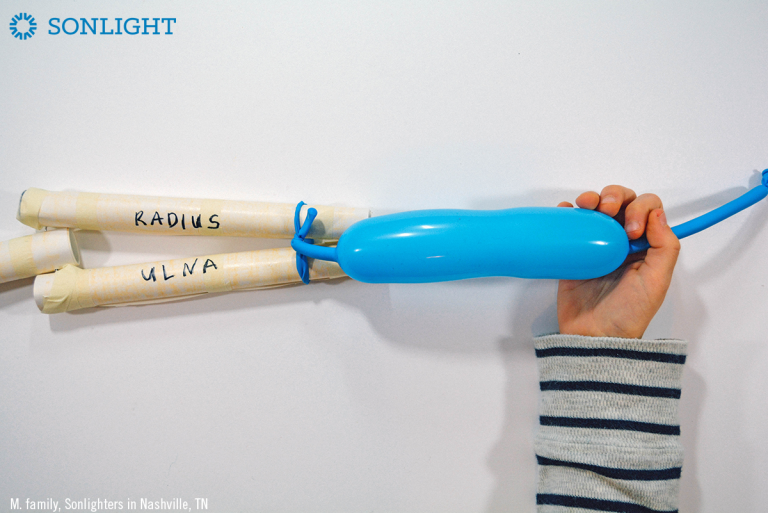
Tie the left end of the bicep balloon to the top of the humerus.

Now using the triceps balloon, tie the right end to the right side of the elbow joint.
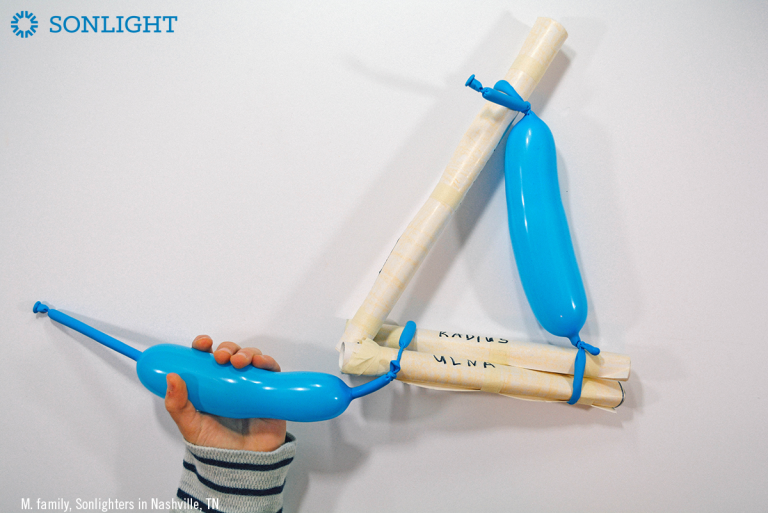
Bring the balloon around the back of the elbow, and tie the remaining loose end of the tricep to the top of the humerus.
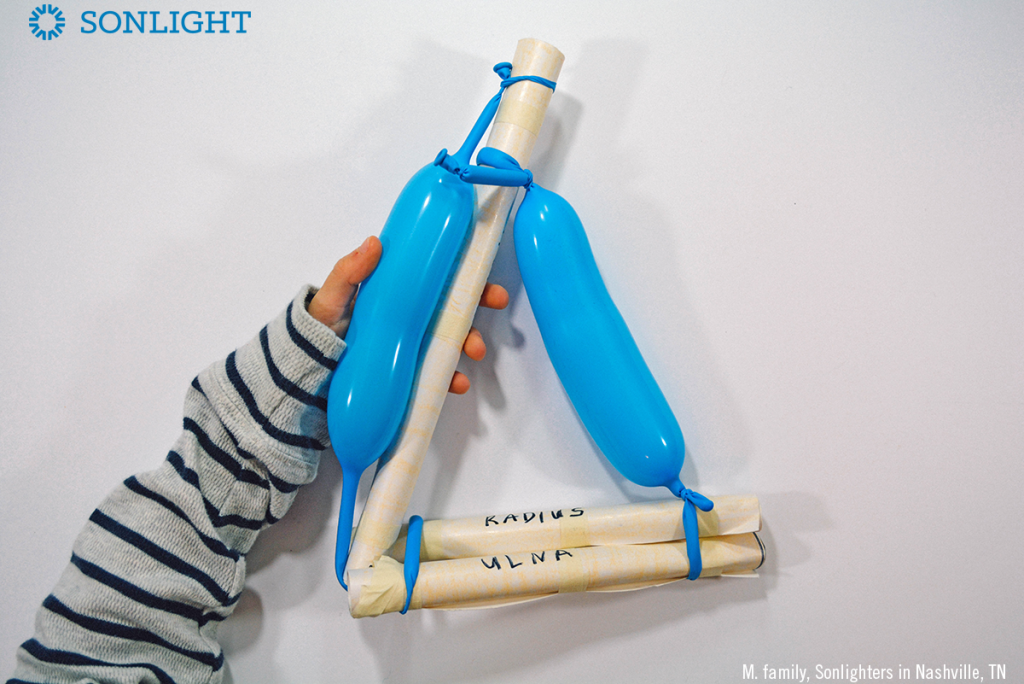
You’ve created a faux, movable arm!

This activity is from
Science F: Health, Medicine, and Human Anatomy for ages 10-13
What Are We Observing as the Model Moves?
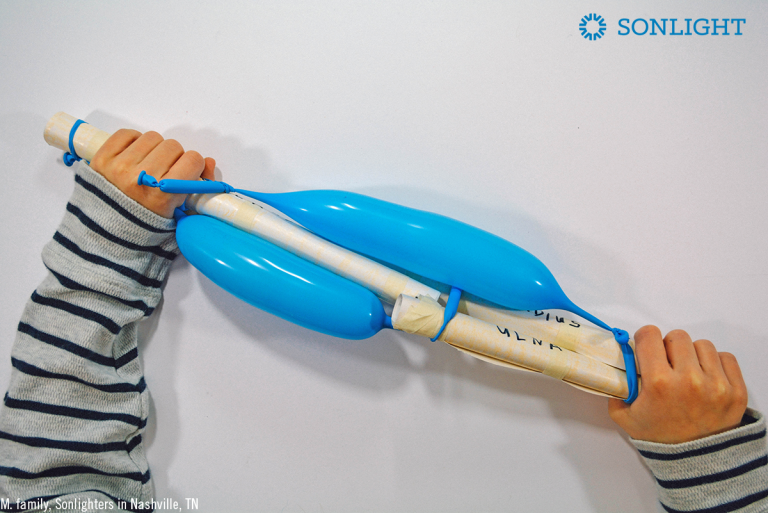
Because our model is simplified, we’ve attached the faux balloon muscles directly to the cardboard bones, leaving out tendons, ligaments, nerves, joint cartilage and fluid, blood vessels. (In fact, we’ve even left out the rest of the arm muscles.) The positioning of the muscles and bones here isn’t precisely anatomically correct; your real flesh-and-blood arm is a lot more complicated. But let’s test our model, discuss the results, and see what we can observe about muscle action.
[Q] Would the model arm work properly with only one balloon muscle?
[A] No. This is because skeletal muscles—like the ones in your arms—must work together in pairs. We call these pairs the flexor and the extensor. In this model (and in your own arms) the bicep is the flexor and the tricep is the extensor.
[Q] Straighten your model arm. What happens to the tricep (extensor) muscle?
[A] Because we used the word extensor to describe the tricep in this muscle pair, you might have expected the tricep to extend. But it contracts, doesn’t it? Extensor muscles must contract in order to straighten a limb.
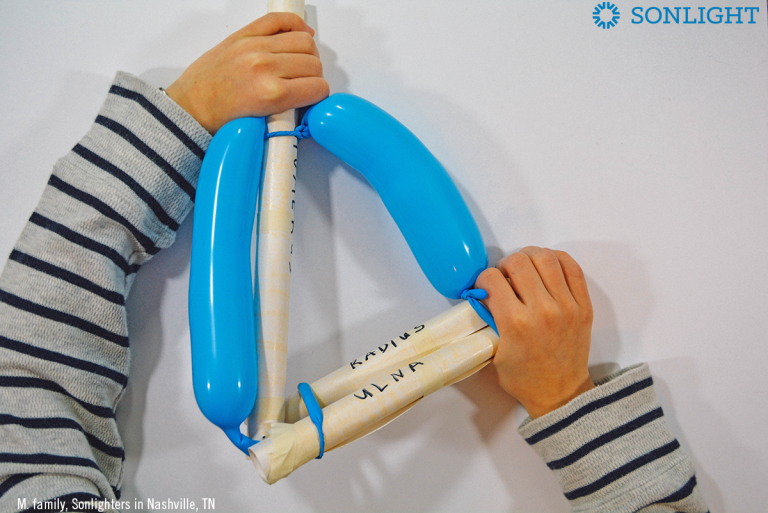
[Q] Bend your faux elbow joint. What happens to the bicep (flexor) muscle?
[A] It contracts! Just as extensors contract to straighten a limb, flexors contract to bend the limb (at the attached joint, of course. Otherwise, things would get weird.)
[Q] Bend your model arm back and forth several times. Observe the changes that happens to the bicep (flexor) and tricep (extensor) as you bend and straighten, bend and straighten.
[A] That’s a lot of contracting and extending, extending and contracting! Both flexor and extensor need to be able to extend and contract in order to for your elbow to bend back and forth, don’t they? Flexed biceps might get all the attention, but a perpetually contracted flexor muscle would mean a perpetually bent arm. When you need to straighten your arm, the extensor tricep contracts and pulls on your bones via tendons, and your arm stretches out. Ready to bend your arm again? The flexor bicep pulls instead, and the elbow joint bends.
[Q] Is the arm the only place we see a muscle pair act like this?
[A] No. Striated skeletal muscles—those are the long muscles which attach to your bones—work the same way. You probably sat down to read this, right? As you did, your hamstrings contracted to allow your knees to bend. When you stand up again, your quadriceps will contract and pull, your hamstrings will extend, and your legs will straighten.
The human body is a complex and wonderful machine, isn’t it? There are hundreds of joint and muscles in our body, each one expertly designed with myriad interconnected parts.

Sonlight guides students through a fascinating and marvelous exploration of the human body and nutrition with Science F: Health, Medicine and Human Anatomy, a rich literature-based program infused with lots of robust hands-on projects. See it and other Science programs here.


3 Comments